Forum Announcement, Click Here to Read More From EA_Cade.
The Easy-Peasy Distant Terrain Tutorial
 HeyWhatReub
Posts: 81 New Member
HeyWhatReub
Posts: 81 New Member
Early on in my CAW adventures, I got quite bored of making islands. I live on an island and trust me, it's not as romantic as non-insular people seem to think.  However, disguising the edges of the world is a pain - a glimmer of that endless ocean always peeps through any mountains you build up and we all know how annoying distant terrain is...
Or maybe not. After a few false starts and worlds I got bored with whilst I was still blending the distant terrain in, I developed what I call The Easy-Peasy Distant Terrain Method. Whilst I would consider the tutorial to be beginner standard, it assumes you have used CAW before or at least know where things are and therefore know things like how to start a new world, access sculpting tools and move objects around. For an introduction to CAW, I would recommend the following video tutorials: Part 1 and Part 2. This tutorial is using the Sunset Valley distant terrain; it does work with others, but you may not need quite such high hills (that’ll make sense in a minute.)
And now, let us begin!
The Easy-Peasy Distant Terrain Tutorial
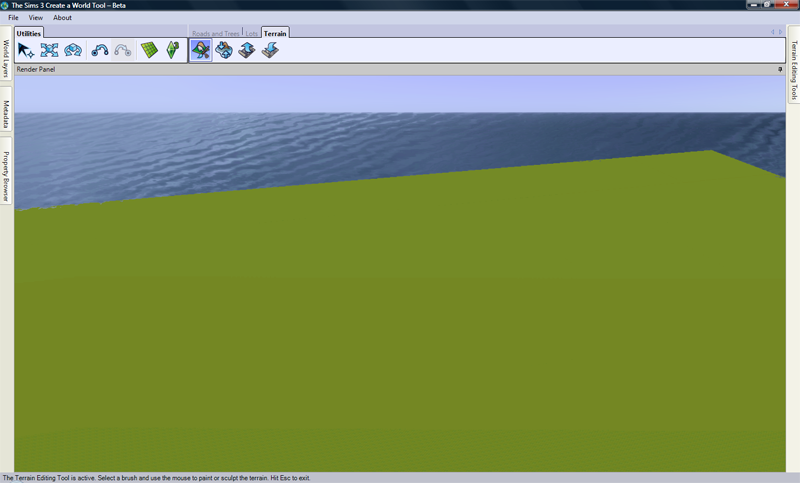
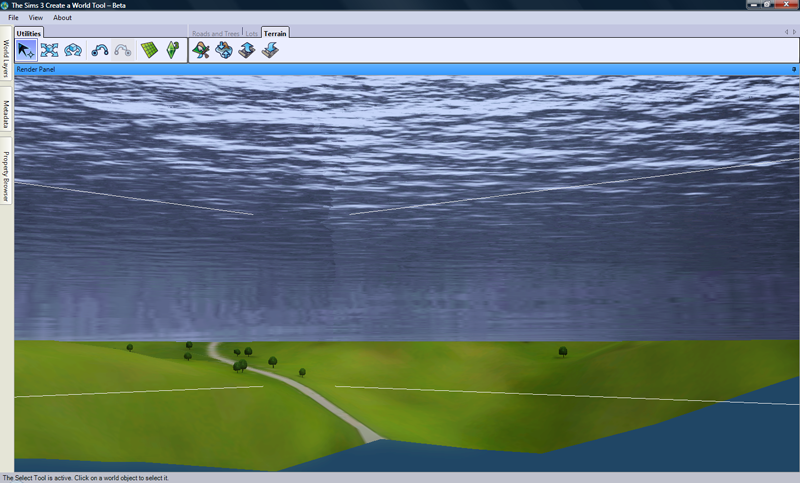
1. For this method of distant terrain placement, it is easiest to do it before you've sculpted and started to build up your world and this world has to be a large map with a maximum height of 300. So, you have your blank large 300 map.
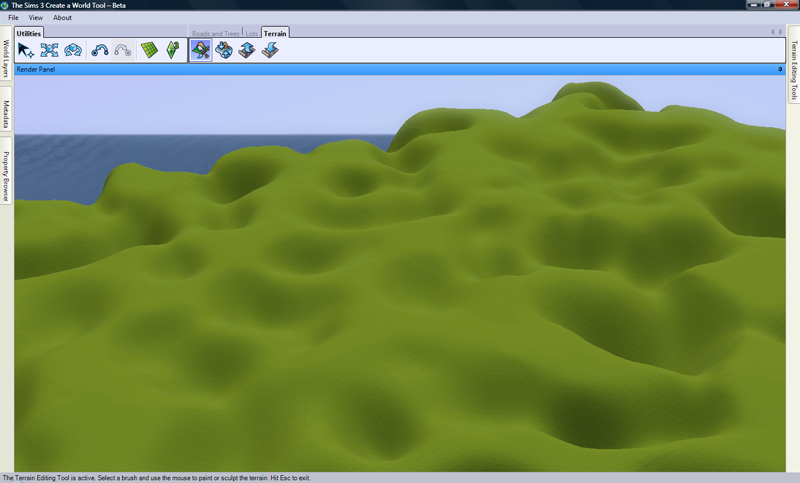
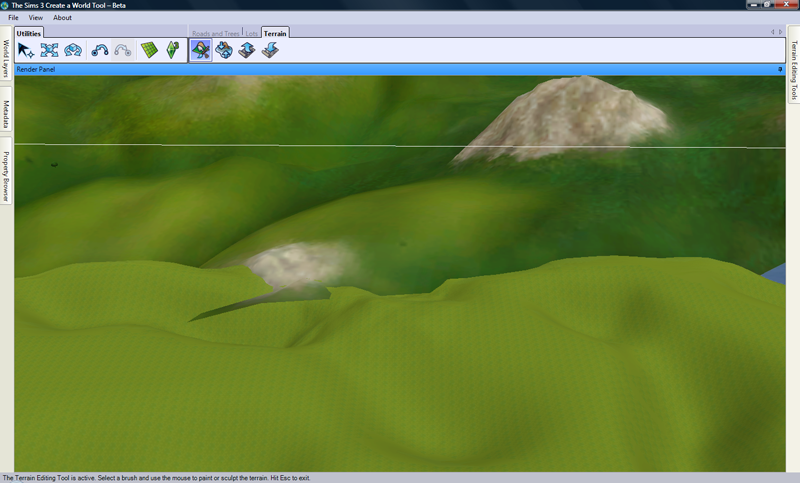
2. Go to Terrain Sculpting Tools>Sculpt>Hill – Steep. Put the brush onto a size 100 and start to build hills everywhere on your world.
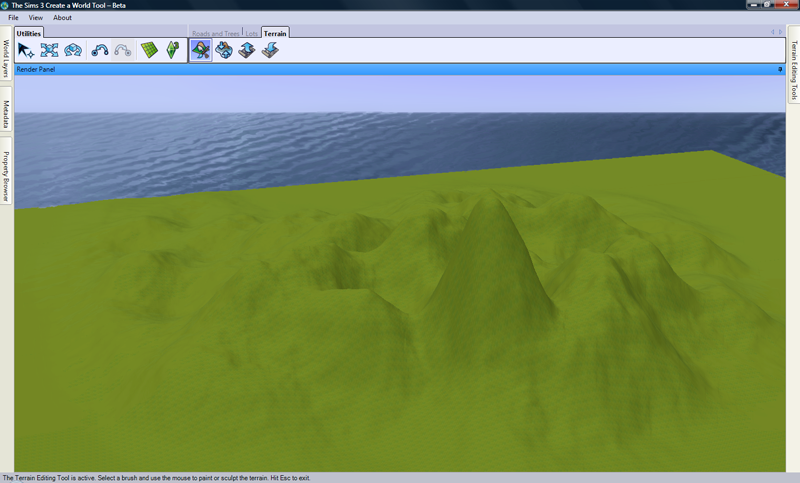
3. Eventually, you will reach a point where it plateaus. Don’t worry about this, you actually want this – it means that your hills have reached their maximum height, which is good.
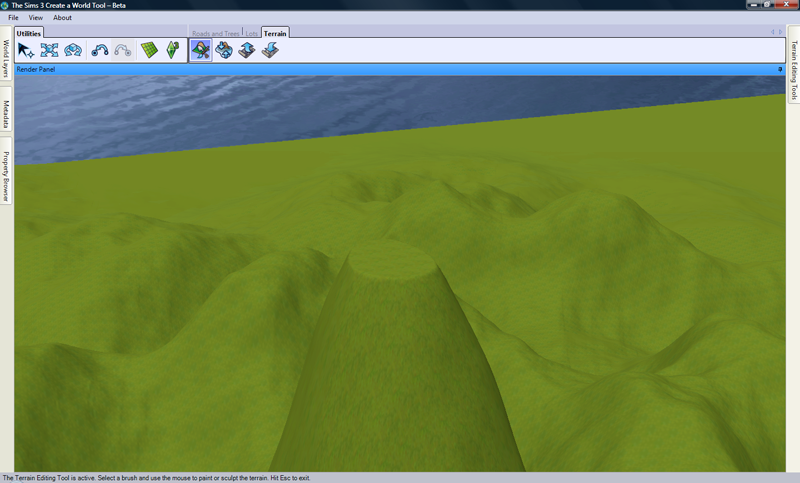
4. Continue until you have covered the whole world covered in high hills, including a lot of plateau’d areas but don’t have everything at the same, highest level.
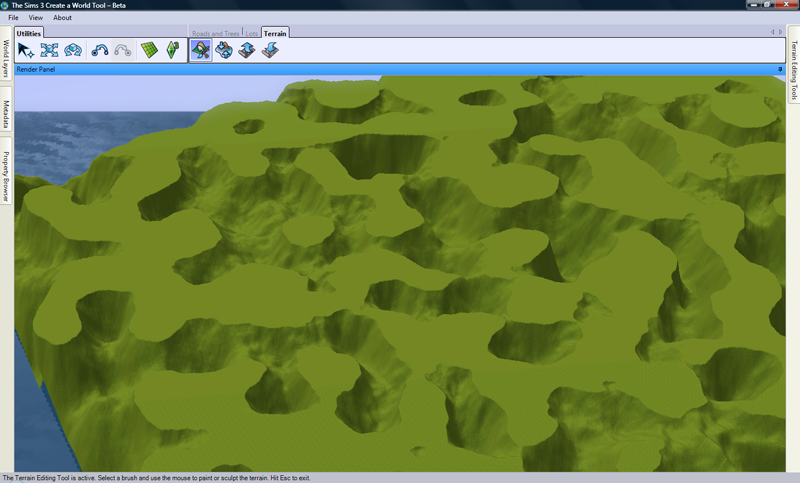
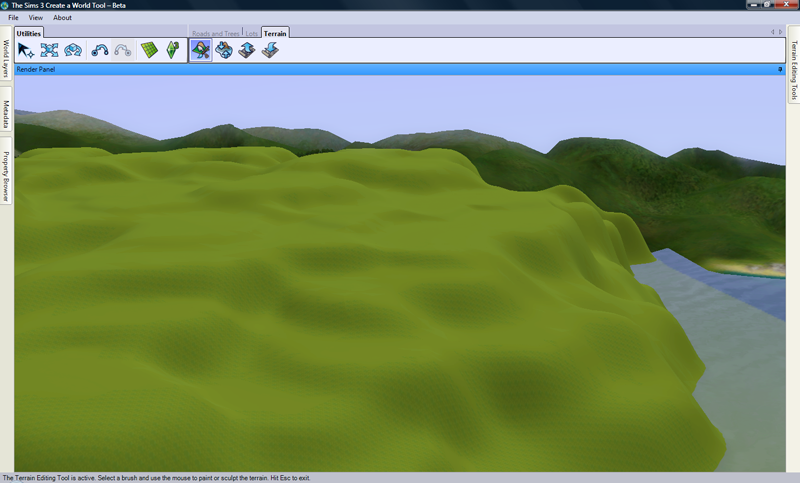
5. Change to the Smooth sculpt tool and smooth the hills down. You’re not looking for the world to be perfectly sculpted at this stage, you just need a high, bumpy land.
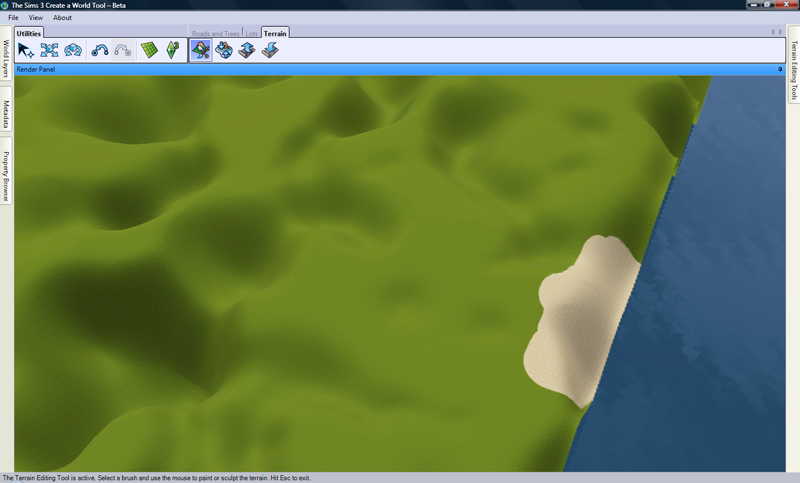
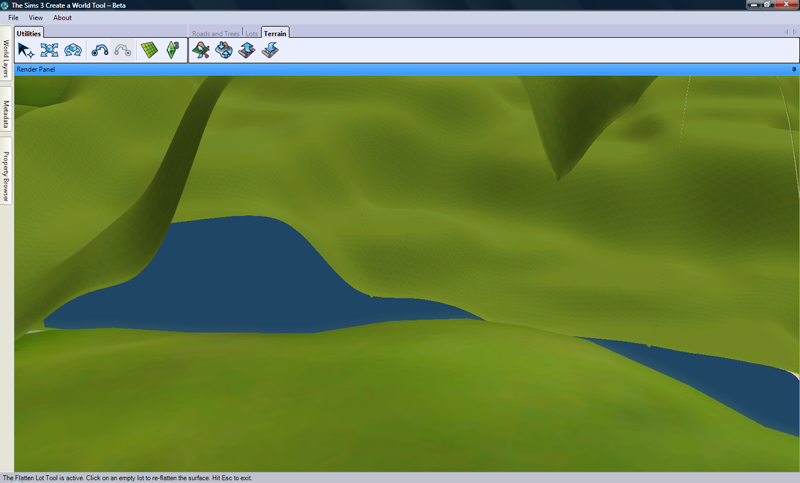
6. The Sunset Valley distant terrain only surrounds two full sides of the world and half of one side with the remaining side completely free, so you should also decide where to place your ‘beach’ area. Mark it; I’ve used sand terrain paint here.
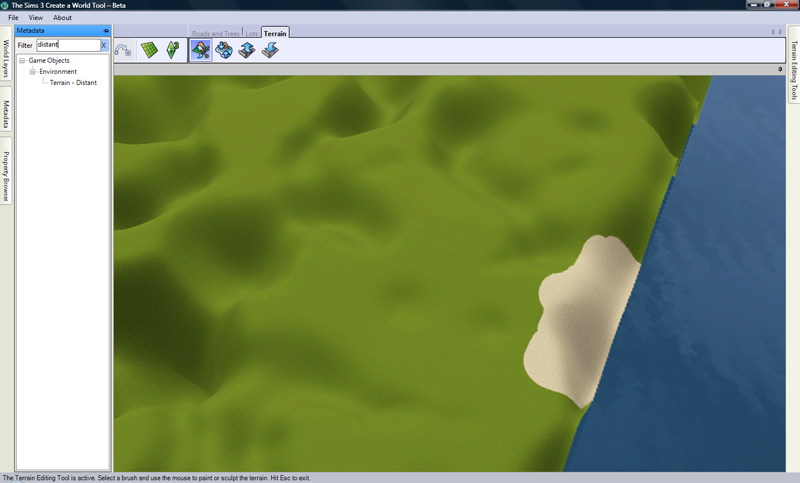
7. Add a layer to the world, then make your new layer the active layer. Go to Metadata and search ‘distant’. You’ll see an object called Terrain – Distant as a result; double click on it.
8. Congratulations, you’ve now selected a massive object that you currently have very little control over. Smaller objects move with the cursor; this won’t. Just place it, then press ESC on your keyboard to de-select it. You still won’t be able to move it yet.
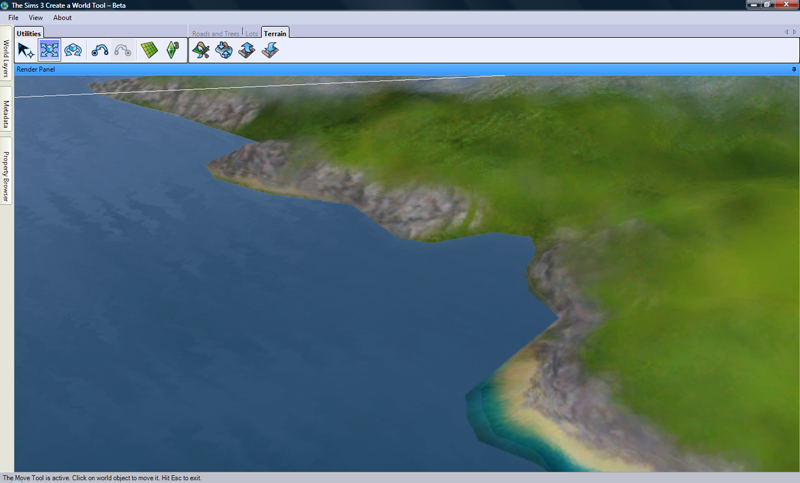
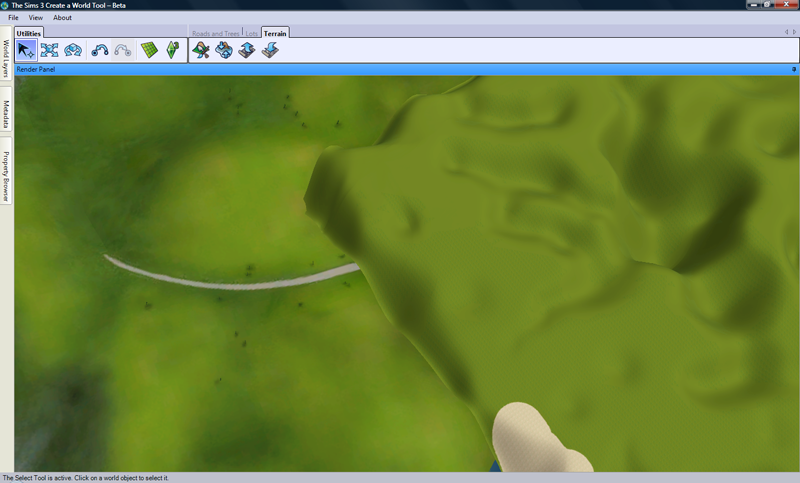
9. Within the World Layers tab, find the distant terrain object, right-click on it and select Find in Render Panel. This will move your view to a strange angle; mine was trapped under the sea.
10. A bit of moving around and you will be able to get your view into a sensible position. Once there, click on the Move World Object utilities tool.
11. You now have these fellows so that you can slide your distant terrain object around.
12. Using the two horizontal lines, slide it around until the corner of the corner of the distant terrain is in the corner of the world, but so that the edges of the distant terrain are overlapping with the world’s hills.

13. You’ll notice that some of the distant terrain is submersed.
14. Using the vertical moving line, move the distant terrain up until it’s just about not submersed.
15. You don’t have to use the orientation CAW has automatically selected. I’ve now decided that I would like my ‘beach’ side to be the half-surrounded side, so time to rotate the distant terrain. All rotations are around the point where the moving lines meet, so slide the distant terrain so that point is central to where you want to rotate.

16. Click on the Rotate World Object utilities tool. These work in the same way as the moving lines, but here you’re only concerned with the horizontal ring.

17. Rotate the distant terrain until you’re roughly happy with it.
18. It’s unlikely that you’re got it perfectly straight. However, there’s an easy way to fix this: in the Property Browser tab, you can get the co-ordinate position of the distant terrain. You’ll also see Rotation Y with a value next to it.
19. Highlight and change this value to whichever of the following numbers the value is currently nearest: 0, 90, 180, 270, 360. Here, my 87.375 will change to 90. It makes the distant terrain straight with the world edges.
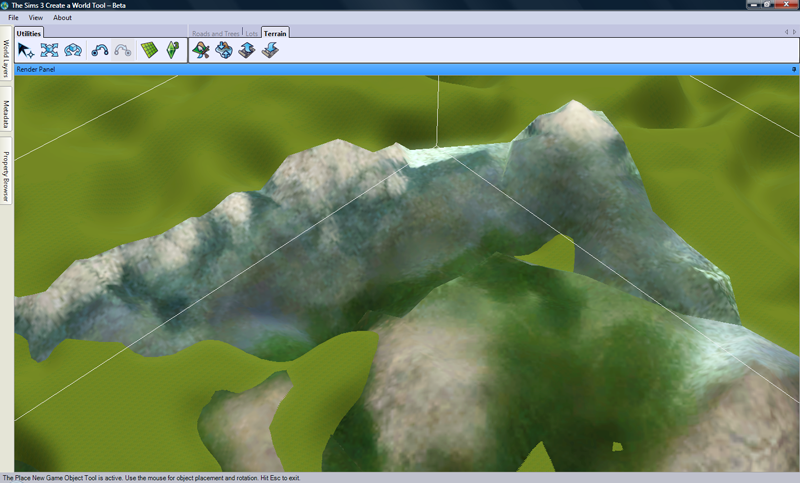
20. It looks like an unholy mess. Believe it or not, you’re actually nearly done.
21. However, you will have plenty of these bits – where the hills float over the distant terrain.
22. They’re easy to fix. Go to Terrain Sculpting Tools>Sculpt> Valley – Gentle and click over these floating parts until you see the distant terrain breaking through. Do this anywhere you have floating land.
23. On the contrary, you’ll also find bits where the distant terrain floats above the land.
24. To solve these, you do the reverse of the previous step: using the Hill – Gentle, you click on the land below until it starts to break through onto the distant terrain.
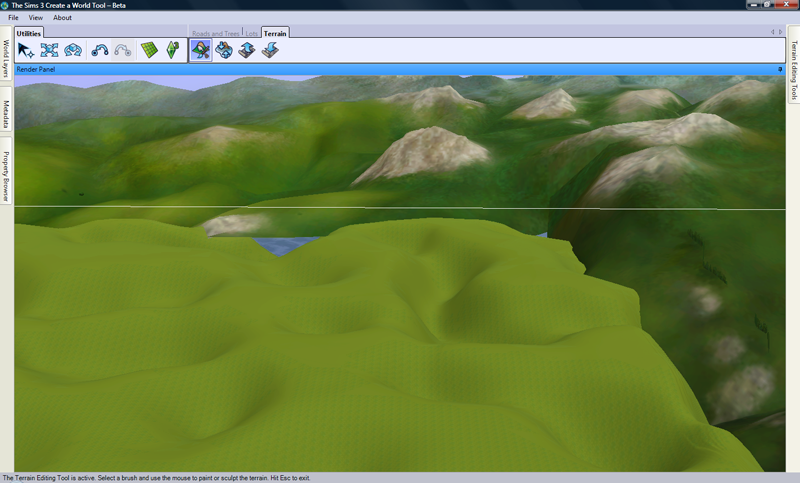
25. Once you’ve finished doing these two tweaks, you’ve placed and blended your distant terrain. With some additional sculpting (more than I’m demonstrating here) you could have a very lovely world to build with.
It’s not as neat at the edges as spending ages carefully building individual hills would be, but some camera non-routable paint will easily take care of that and, most importantly, you haven’t got bored whilst doing it and given up on your world – the example above, including a bit of sculpting, took about 2 hours. Some effort can turn it into a very nice world; this is one of mine, where I used this method with 2 distant terrains so I could land-lock the world.
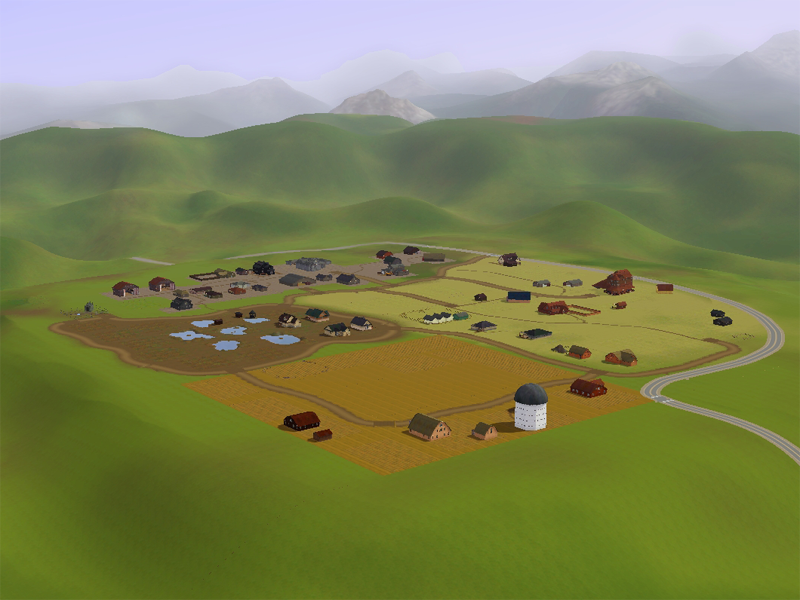
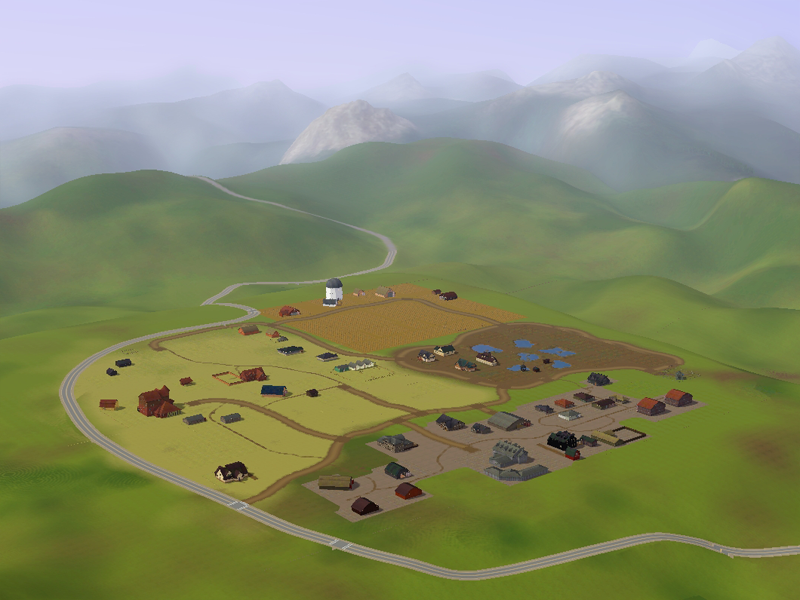
And now you know how easy it is to place a distant terrain, there’s no reason for you to feel forced to create islands anymore.
- Rubey.")
Or maybe not. After a few false starts and worlds I got bored with whilst I was still blending the distant terrain in, I developed what I call The Easy-Peasy Distant Terrain Method. Whilst I would consider the tutorial to be beginner standard, it assumes you have used CAW before or at least know where things are and therefore know things like how to start a new world, access sculpting tools and move objects around. For an introduction to CAW, I would recommend the following video tutorials: Part 1 and Part 2. This tutorial is using the Sunset Valley distant terrain; it does work with others, but you may not need quite such high hills (that’ll make sense in a minute.)
And now, let us begin!
The Easy-Peasy Distant Terrain Tutorial
1. For this method of distant terrain placement, it is easiest to do it before you've sculpted and started to build up your world and this world has to be a large map with a maximum height of 300. So, you have your blank large 300 map.
2. Go to Terrain Sculpting Tools>Sculpt>Hill – Steep. Put the brush onto a size 100 and start to build hills everywhere on your world.
3. Eventually, you will reach a point where it plateaus. Don’t worry about this, you actually want this – it means that your hills have reached their maximum height, which is good.
4. Continue until you have covered the whole world covered in high hills, including a lot of plateau’d areas but don’t have everything at the same, highest level.
5. Change to the Smooth sculpt tool and smooth the hills down. You’re not looking for the world to be perfectly sculpted at this stage, you just need a high, bumpy land.
6. The Sunset Valley distant terrain only surrounds two full sides of the world and half of one side with the remaining side completely free, so you should also decide where to place your ‘beach’ area. Mark it; I’ve used sand terrain paint here.
7. Add a layer to the world, then make your new layer the active layer. Go to Metadata and search ‘distant’. You’ll see an object called Terrain – Distant as a result; double click on it.
8. Congratulations, you’ve now selected a massive object that you currently have very little control over. Smaller objects move with the cursor; this won’t. Just place it, then press ESC on your keyboard to de-select it. You still won’t be able to move it yet.
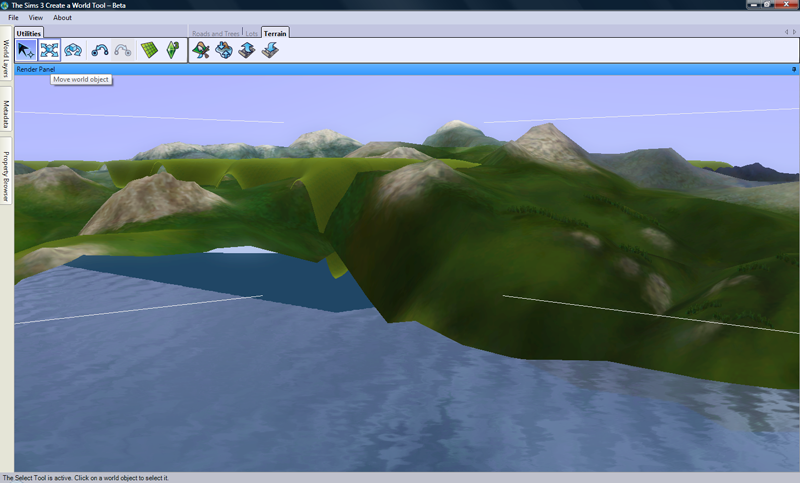
9. Within the World Layers tab, find the distant terrain object, right-click on it and select Find in Render Panel. This will move your view to a strange angle; mine was trapped under the sea.
10. A bit of moving around and you will be able to get your view into a sensible position. Once there, click on the Move World Object utilities tool.
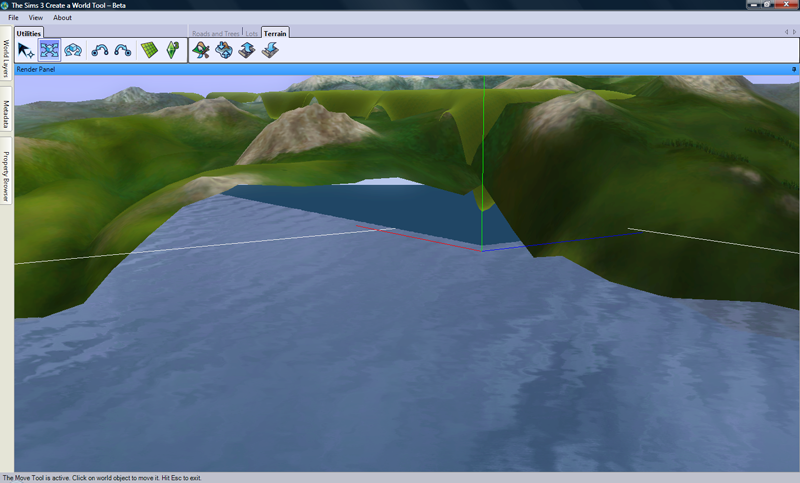
11. You now have these fellows so that you can slide your distant terrain object around.
12. Using the two horizontal lines, slide it around until the corner of the corner of the distant terrain is in the corner of the world, but so that the edges of the distant terrain are overlapping with the world’s hills.
13. You’ll notice that some of the distant terrain is submersed.
14. Using the vertical moving line, move the distant terrain up until it’s just about not submersed.
15. You don’t have to use the orientation CAW has automatically selected. I’ve now decided that I would like my ‘beach’ side to be the half-surrounded side, so time to rotate the distant terrain. All rotations are around the point where the moving lines meet, so slide the distant terrain so that point is central to where you want to rotate.
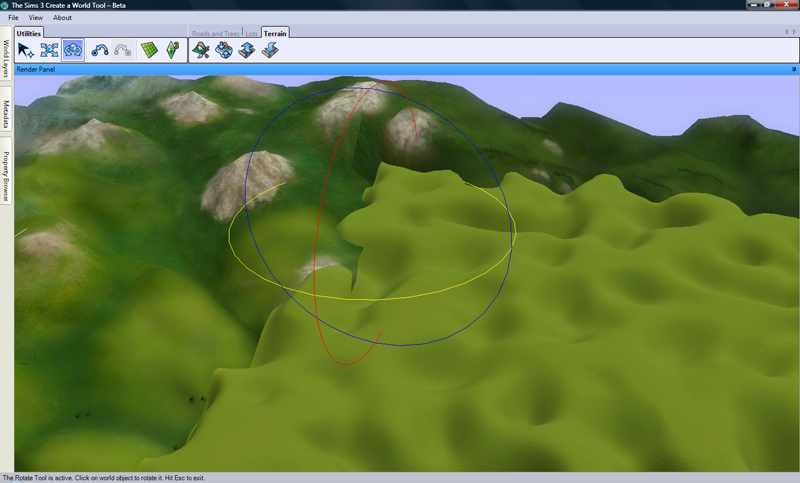
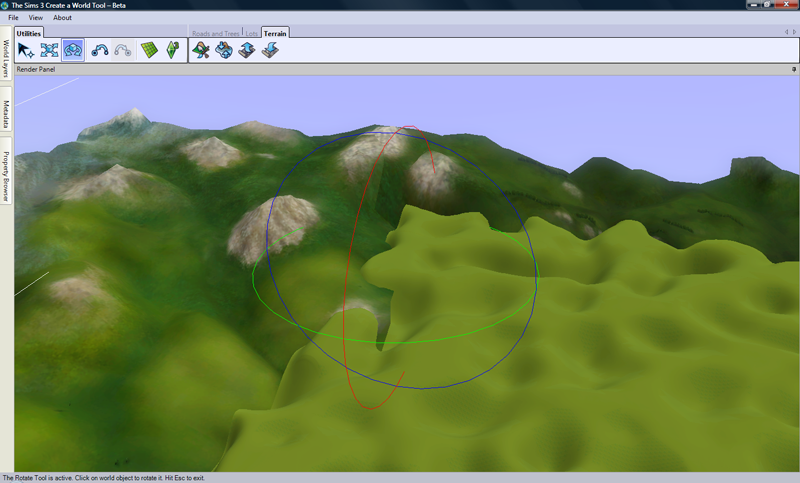
16. Click on the Rotate World Object utilities tool. These work in the same way as the moving lines, but here you’re only concerned with the horizontal ring.
17. Rotate the distant terrain until you’re roughly happy with it.
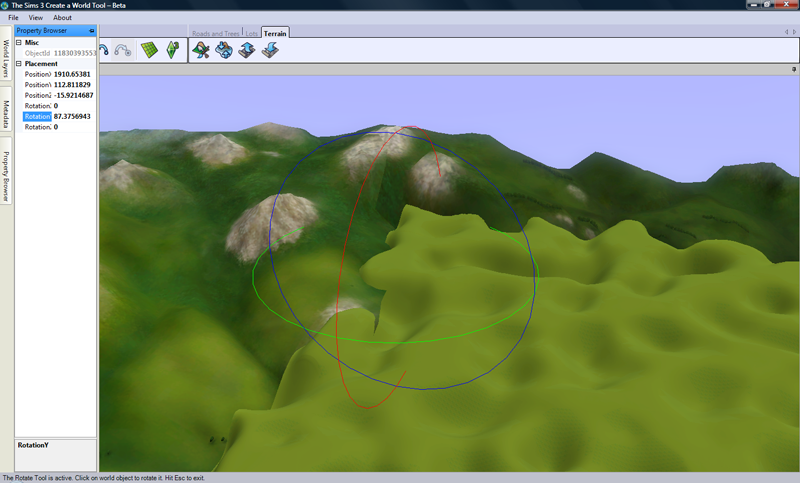
18. It’s unlikely that you’re got it perfectly straight. However, there’s an easy way to fix this: in the Property Browser tab, you can get the co-ordinate position of the distant terrain. You’ll also see Rotation Y with a value next to it.
19. Highlight and change this value to whichever of the following numbers the value is currently nearest: 0, 90, 180, 270, 360. Here, my 87.375 will change to 90. It makes the distant terrain straight with the world edges.
20. It looks like an unholy mess. Believe it or not, you’re actually nearly done.
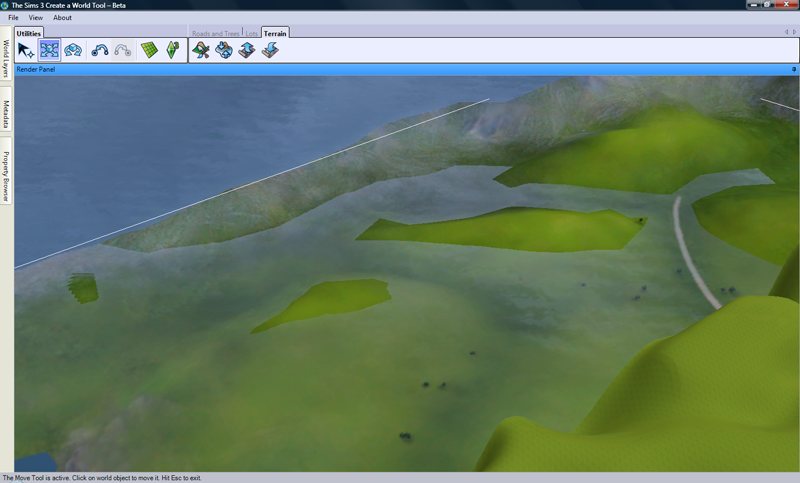
21. However, you will have plenty of these bits – where the hills float over the distant terrain.
22. They’re easy to fix. Go to Terrain Sculpting Tools>Sculpt> Valley – Gentle and click over these floating parts until you see the distant terrain breaking through. Do this anywhere you have floating land.
23. On the contrary, you’ll also find bits where the distant terrain floats above the land.
24. To solve these, you do the reverse of the previous step: using the Hill – Gentle, you click on the land below until it starts to break through onto the distant terrain.
25. Once you’ve finished doing these two tweaks, you’ve placed and blended your distant terrain. With some additional sculpting (more than I’m demonstrating here) you could have a very lovely world to build with.
It’s not as neat at the edges as spending ages carefully building individual hills would be, but some camera non-routable paint will easily take care of that and, most importantly, you haven’t got bored whilst doing it and given up on your world – the example above, including a bit of sculpting, took about 2 hours. Some effort can turn it into a very nice world; this is one of mine, where I used this method with 2 distant terrains so I could land-lock the world.
And now you know how easy it is to place a distant terrain, there’s no reason for you to feel forced to create islands anymore.
- Rubey.
Post edited by EA_Solaire on
0
Comments
I always make sure to check where the sun rises and sets too (using the 'time of day' setting) when I begin to place my distant terrain; that ensures you have the best views and the light quality you want.
RUSH
My Worlds
Thanks.
I hate it when I check where the sun rise and set will be, then find I have to decide between having those where I want or having water that flows towards my beach, not away from it. It's almost like EA didn't really care about CAW working... :roll:
I'll list it under Metadata Objects in the FAQ
The Sims Creators' Consortium
The step by ste p is very appreciated
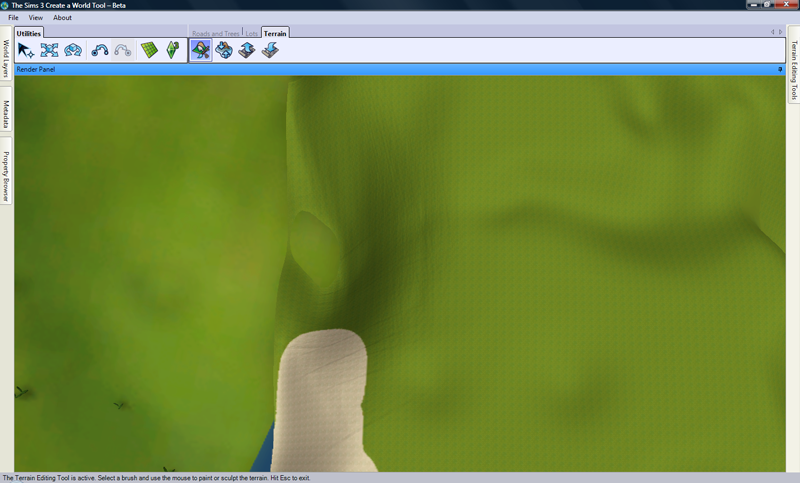
I'm having a problem placing the DT on a large map. When I select to go to the rendering, all I can see is this:
I don't know why I can't seem to navigate, but when I move my mouse and/or navigation keys all I can see are what look like snippets of my world. Have you had this happen? The picture looks like blue sky so is my DT somehow up in the air?
I'm sooo confused.... :XD: :hunf:
Edit: I forgot to attach photo.
I'd agree that it looks like sky. If you hold down the wheel of your mouse and drag the mouse towards you, do you still get the snippets of land? How zoomed in are you? What kind of angle did you have when placing the DT - was it like the one in picture 7?
No idea why though
I saved right before placing the DT and quitting since I was getting frustrated at looking at nothing. so when I get back around to fiddling with CAW, I'll try both your method and see if I can navigate around to the DT and I'll try what VanillaTwilight said about selecting the render panel again.
Not sure why it was freaking out on me like that but I'm so glad you got back to me. Thanks, both VT & Rubey. 8)
Just thought I'd say that I finally got DT situated. I seriously don't think I could have even done it without the help of this thread. Thanks again. 8)
Pleased it got sorted.